
Table of Contents
- Step 1: Identify the Root Cause of Your Patio Drainage Issues
- Patio Slope Requirements for Drainage: Getting the Grade Right
- Best Drainage Systems for Paver Patios
- How to Install a Channel Drain in a Patio: Step-by-Step
- Subbase Materials, Compaction, and Geotextile Fabric
- Managing Patio Drainage Issues Across Different U.S. Climates
- Permeable Pavers: Materials, Integration, and Maintenance
- DIY vs. Professional Intervention: When to Call a Contractor
Last Updated: August 2, 2026
Poor drainage is one of the most common and destructive problems in residential hardscaping. Standing water, cracked pavers, and eroded landscaping after the first major rainstorm are preventable. Most drainage failures are predictable, and fixable. Below, we’ll show you how to diagnose the root cause, choose the right drainage system, and build a patio that handles water correctly from day one.
Here’s what most guides get wrong: they focus on surface fixes while ignoring subsurface conditions. A channel drain installed over a poorly compacted subbase will fail within a few seasons. Getting drainage right means working from the ground up.
Step 1: Identify the Root Cause of Your Patio Drainage Issues
Effective drainage design starts with an honest site assessment. Before selecting any drainage system, you need to understand what’s actually causing water to pool.
Reading Your Site’s Topography and Soil Saturation
Topography is the natural contour of your land, and it dictates where water flows. Walk your property during or after rain and trace the water’s path. Is runoff coming from an adjacent slope? Is water migrating from a neighboring property? Is the patio sitting in a natural low point?
Soil saturation is critical. Clay-heavy soils common across South Texas drain slowly, creating conditions where water sits on the surface long after rain stops. A simple percolation test, digging a 12-inch hole and timing how quickly a gallon of water absorbs, gives you a baseline for how aggressive your drainage solution needs to be. The water table matters too. In parts of South Texas and the Gulf Coast region, the water table sits close to the surface, which limits subsurface drainage options. In those cases, surface diversion becomes more critical.
Signs of Poor Patio Drainage You Should Not Ignore
Catch drainage problems early to avoid significant repair costs:
- Puddles remaining on paver surfaces 30 minutes or more after rain
- Efflorescence (white chalky residue) on pavers or concrete
- Pavers that rock, sink, or shift unevenly
- Moss, algae, or mold growth on the patio surface
- Soil erosion at patio edges or in adjacent planting beds
- Water intrusion into a garage, foundation, or basement near the patio
Any one of these signals a drainage problem worth addressing before it compounds.
Patio Slope Requirements for Drainage: Getting the Grade Right
The correct patio slope for drainage is a minimum of 1/8 inch drop per linear foot, though 1/4 inch per foot is recommended for high-rainfall climates or clay-heavy soils.
Slope direction is just as important as slope magnitude. Grading a patio away from the house is non-negotiable. Water directed toward a foundation creates hydrostatic pressure against the footing, causing long-term structural damage. The grade must pitch away from all structures, toward a designated drainage outlet, catch basin, or permeable landscaping zone.
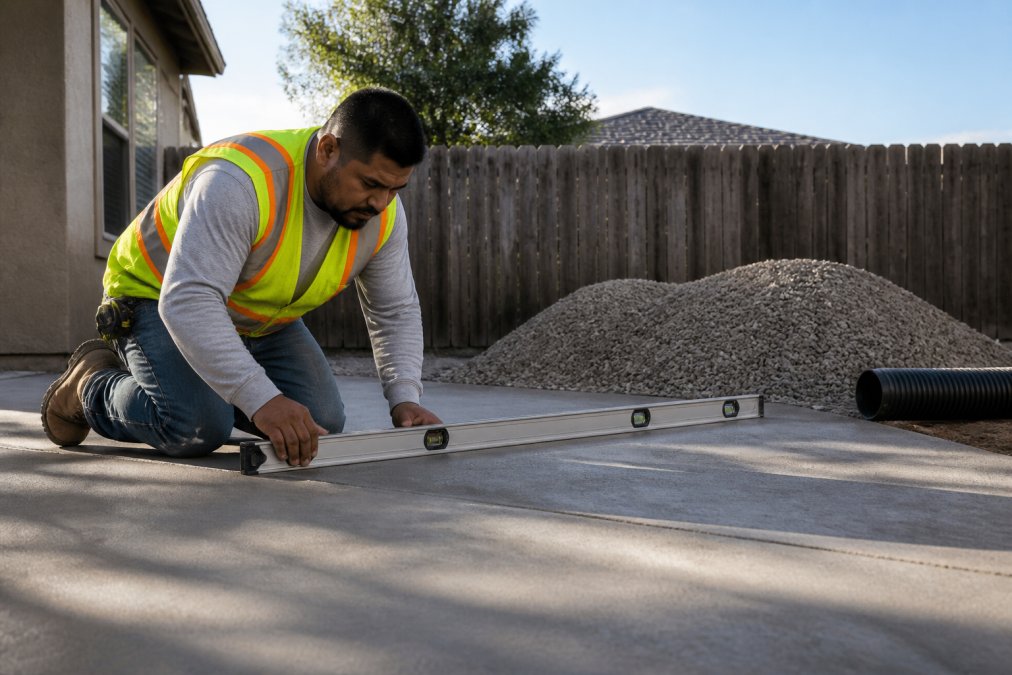
For a 12-foot patio, a 1/4-inch-per-foot grade translates to 3 inches of total elevation change from high point to low point. Use a string line and a line level to verify grade during installation. Correcting slope errors after pavers are set requires pulling up and resetting the entire surface.
For patios wider than 16 feet, consider a crowned slope: grading both halves toward a central channel drain rather than pitching the entire surface to one edge. This prevents water from traveling too far across the surface before reaching an outlet.
A level patio is a drainage problem waiting to happen. The 1/4-inch-per-foot grade is barely perceptible to the eye but makes a significant difference in how quickly water clears the surface.
Best Drainage Systems for Paver Patios
Choosing the best drainage system depends on the volume of runoff, soil type, the patio’s relationship to the house, and the surrounding landscape.
French Drains and Trenching Solutions
A French drain is a gravel-filled trench containing a perforated drainage pipe, typically wrapped in geotextile fabric. French drains intercept subsurface water and redirect it away from the patio area, particularly when water migrates laterally from an uphill slope.
Installation involves trenching along the uphill side of the patio, lining the trench with geotextile fabric, filling with crushed gravel, laying the perforated pipe with perforations facing down, and backfilling with more gravel. The pipe must slope at least 1 percent toward the outlet, a dry well, culvert, or daylight at a lower elevation.
According to the University of Minnesota Extension drainage guidance, French drains are most effective when installed at the boundary between the problem area and the water source, rather than directly under standing water.
Catch Basins and Dry Wells for Surface Runoff
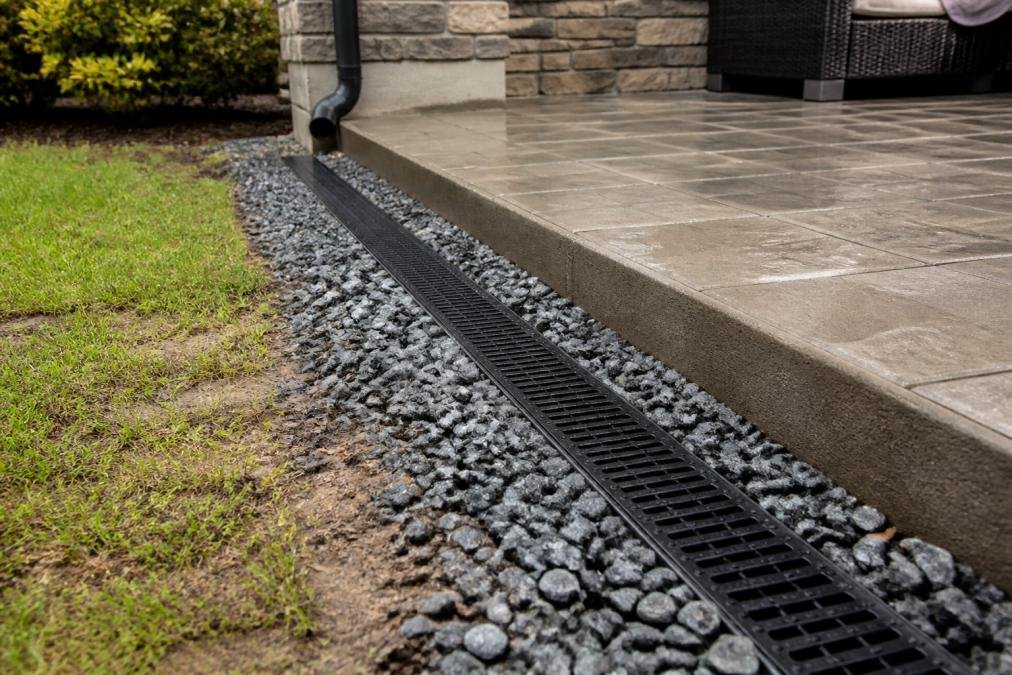
A catch basin is a surface inlet, typically a grated box set flush with the patio, that collects surface runoff and channels it through an underground drainage pipe to an outlet. Catch basins handle high-volume surface water efficiently.
A dry well is an underground chamber, often a perforated barrel or gravel pit, that stores collected water and allows it to percolate slowly into surrounding soil. Dry wells work well in areas with adequate soil permeability. In South Texas, where clay soils limit percolation, a dry well needs to be sized generously or combined with a French drain to prevent overflow during heavy rain.
| Drainage System | Best For | Soil Type | Maintenance Frequency |
|---|---|---|---|
| French Drain | Subsurface lateral water | Any, with geotextile | Every 3-5 years |
| Catch Basin | High-volume surface runoff | Any | Annual cleaning |
| Dry Well | Moderate runoff, good percolation | Sandy or loamy | Every 2-3 years |
| Channel Drain | Linear surface runoff across patio | Any | Annual cleaning |
| Permeable Pavers | Distributed surface absorption | Sandy or amended | Periodic sand refill |
How to Install a Channel Drain in a Patio: Step-by-Step
A channel drain, also called a trench drain or linear drain, intercepts water sheeting across the surface before it reaches the house or a low point.
Total Time: 4-8 hours depending on patio size
Difficulty: Intermediate
What You’ll Need:
- Channel drain body and grate
- Drainage pipe (4-inch minimum)
- Crushed gravel
- Geotextile fabric
- Concrete or mortar
- Angle grinder or circular saw with diamond blade
- Level and string line
Steps:
-
Mark the drain location. Position the channel at the lowest point of the patio slope or where water naturally concentrates. The drain must run perpendicular to the primary slope direction.
-
Cut the paver or concrete surface. Use a diamond blade saw to cut a clean trench the width of your drain body.
-
Excavate the trench. Dig to a depth that allows the drain grate to sit flush with the finished patio surface.
-
Install geotextile fabric. Line the trench walls and base to prevent backfill from migrating into the drainage pipe.
-
Set the drain body in mortar or concrete. Verify the drain is level side-to-side and sloped longitudinally toward the outlet pipe at a minimum 1-percent grade.
-
Connect the outlet pipe. Run a 4-inch solid drainage pipe from the channel drain outlet to a dry well, catch basin, or daylight outlet, maintaining slope throughout.
-
Backfill with crushed gravel. Pack gravel around the drain body before reinstalling surrounding pavers.
-
Install the grate and test. Run water through the system with a hose before completing surrounding work.
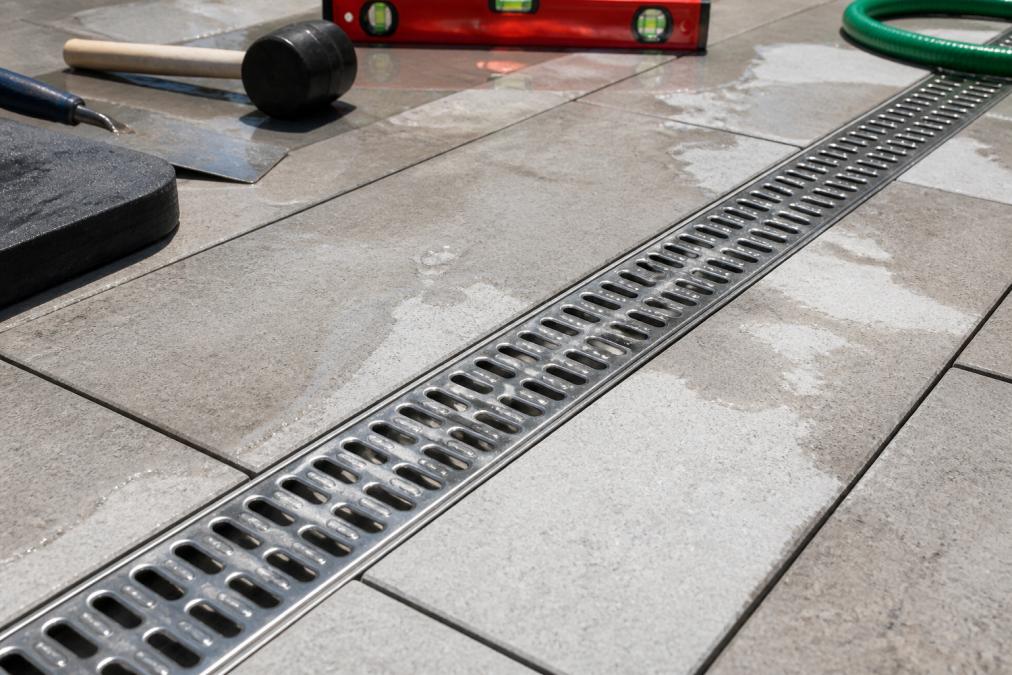
Never connect a patio channel drain directly to a municipal storm sewer without verifying local ordinances. Many jurisdictions restrict or prohibit this connection. Routing to a dry well or permeable area on your own property is typically the safest and most compliant approach.
Subbase Materials, Compaction, and Geotextile Fabric
The subbase is where most patio drainage failures originate. A poorly prepared subbase traps water beneath the surface, causing pavers to shift, settle unevenly, and crack during freeze-thaw cycles.
The standard subbase consists of 4 to 6 inches of compacted crushed gravel, clean angular stone that compacts well and drains freely. Rounded river gravel is not appropriate; it doesn’t interlock under compaction and shifts over time.
Geotextile fabric separates the subbase from native soil below, preventing fines from migrating upward into the gravel and reducing drainage capacity over time. The fabric goes between the native soil and the gravel base, not between the gravel and the bedding sand layer.
Compaction is non-negotiable. Each layer of subbase material should be compacted with a plate compactor in lifts no thicker than 4 inches. Inadequate compaction leads to differential settlement, which creates low spots that collect water regardless of surface grading.
As documented in the Interlocking Concrete Pavement Institute installation guidelines, proper subbase preparation accounts for the majority of a paver installation’s long-term performance.
Managing Patio Drainage Issues Across Different U.S. Climates
Climate is the variable most drainage guides ignore. A system that performs well in the Pacific Northwest will fail in South Texas, and vice versa.
Freeze-Thaw Cycles in Northern States
Freeze-thaw cycles are the primary drainage concern in northern states from the Midwest through New England. Water that infiltrates the subbase expands when it freezes, lifting and cracking the surface. This frost heave can destroy a patio installation within a few seasons if the drainage system doesn’t remove water before temperatures drop.
The solution involves deeper subbase excavation, typically 8 to 12 inches rather than 4 to 6, to place the base material below the frost line. Weep holes in retaining walls allow hydrostatic pressure to escape. Permeable pavers are particularly effective because they prevent water from pooling on the surface where it can refreeze into a hazardous ice layer.
Heavy Rain and High Water Tables in South Texas
South Texas presents different challenges: high rainfall intensity during storm events, clay-heavy soils with low permeability, and a water table close to the surface in many areas.
A single storm can deliver several inches of rain in a short window. Standard drainage systems sized for average rainfall often can’t keep up. Design for peak flow instead: larger catch basin inlets, higher-capacity drainage pipes, and surface grading that moves water away from the patio quickly rather than relying on subsurface percolation.
The Texas A&M AgriLife Extension water management resources offer region-specific guidance on managing surface runoff in South Texas soil conditions.
Permeable Pavers: Materials, Integration, and Maintenance
Permeable pavers are paving units designed with open joints or porous material that allow water to pass through the surface and into a prepared subbase below, rather than running off as surface flow.
The most common options include:
- Permeable interlocking concrete pavers (PICP): Concrete units with wider joints filled with small aggregate
- Porous concrete or asphalt: Monolithic surfaces with an open-graded aggregate mix
- Grass or gravel pavers: Plastic or concrete grid systems that support traffic while maintaining a permeable surface
The runoff coefficient of a permeable paver surface is dramatically lower than conventional concrete, meaning a much higher percentage of rainfall infiltrates rather than running off. Water that infiltrates through the paver surface can be directed through the subbase into adjacent planting beds, reducing irrigation needs.
Maintenance is critical. Permeable paver joints fill with sediment over time, reducing infiltration capacity. Annual cleaning with a stiff broom or low-pressure water, combined with periodic joint sand replacement, keeps the system performing correctly. Avoid high-pressure washers, which drive fines deeper into the joint material.
Permeable pavers reduce surface runoff effectively, but they require a properly prepared open-graded subbase to function. Installing permeable pavers over a standard dense-graded subbase eliminates most of their drainage benefit.
DIY vs. Professional Intervention: When to Call a Contractor
Many patio drainage problems are within reach of a skilled homeowner. Others require professional assessment.
DIY is reasonable when:
- The problem is limited to surface grading adjustments on an existing patio
- You’re adding a single catch basin to a small patio with a clear outlet location
- The drainage issue involves surface runoff only, with no subsurface water involvement
- The project doesn’t require cutting into existing hardscaping or connecting to underground pipe systems
Call a professional when:
- Standing water is occurring within 5 feet of a foundation
- The water table is a factor
- The patio is large enough that grading errors are costly to correct
- The site involves multiple drainage sources from different directions
- You’re seeing structural movement in existing pavers, retaining walls, or adjacent structures
- Local ordinances require permitted work for drainage modifications
The cost of getting drainage wrong outweighs the cost of professional installation in most cases. A patio that floods repeatedly, damages a foundation, or requires complete reinstallation within five years is far more expensive than the original professional design.
Alpha Guard’s certified and insured professionals handle custom outdoor living space design and installation for McAllen-area homeowners, including drainage planning specific to South Texas soil conditions and rainfall patterns. Every project includes a site assessment that evaluates topography, soil type, and existing drainage before any design decisions are made.
Frequently Asked Questions
What is the best drainage option for a patio?
The best patio drainage solution depends on your site's topography, soil type, and the volume of surface runoff you need to manage. French drains work well for subsurface water, while channel drains and catch basins handle concentrated surface flow effectively. Permeable pavers are an excellent all-around option because they reduce runoff at the source. A proper site assessment before installation helps you choose the right system and avoid costly fixes later.
What is the required slope for patio drainage?
Most building codes and hardscaping standards in the United States recommend a minimum slope of 1/8 inch to 1/4 inch per foot of patio surface, directing water away from the home's foundation. A 1% to 2% grade is the standard target for paver installation. Slopes below this threshold cause standing water, while slopes steeper than 3% can create tripping hazards and accelerate surface erosion. Always confirm local code requirements with your municipality before construction.
Can a French drain fix standing water on an existing patio?
Yes, a French drain can resolve standing water problems on an existing patio, especially when poor grading or soil saturation is the root cause. The process involves trenching along the patio's low edge, laying a perforated drainage pipe wrapped in geotextile fabric, backfilling with crushed gravel, and directing the pipe to a suitable outlet or dry well. For patios already installed, this is often the least disruptive fix available without a full rebuild.
How do I fix drainage problems around an existing patio without tearing it up?
Start by adding surface-level solutions: a channel drain installed along the patio's low edge intercepts water before it pools. A catch basin at the lowest point can connect to an underground drainage pipe routed to a dry well or street culvert. For minor grading issues, adding riprap or a swale along the patio border redirects runoff into your landscaping. If hydrostatic pressure is lifting pavers or cracking concrete, a professional assessment is the right next step.
What are the signs of poor patio drainage?
The most obvious sign is standing water that remains on the patio surface for more than 30 minutes after rain stops. Other indicators include efflorescence or staining on pavers, soil erosion at the patio edges, frost heaving or cracked pavers from freeze-thaw cycles, moss and algae growth in consistently damp areas, and water pooling against your home's foundation. Catching these signs early prevents structural damage to both the patio and the building.
What subbase materials work best under a paver patio for drainage?
Crushed gravel, typically 3/4-inch angular stone, is the standard subbase material for paver patios because its irregular shape allows water to pass through while supporting compaction. A layer of geotextile fabric beneath the gravel prevents soil migration into the drainage layer. For high-drainage applications or areas with poor soil, an open-graded subbase using ASTM No. 57 stone provides superior permeability. Proper compaction of each layer is as important as material choice for long-term patio drainage performance.
Drainage problems don’t resolve themselves, and a patio that holds water is one that’s actively damaging your property. Alpha Guard works with McAllen homeowners to design and install outdoor spaces built for South Texas conditions, with certified professionals, guaranteed structural workmanship, and affordable financing options to make the project accessible. Get a Free Estimate from Alpha Guard and build a patio that performs correctly from the first rainstorm.
This article was written using GrandRanker