
Table of Contents
- Identifying the Causes of Patio Erosion
- Landscape Edging for Erosion Control
- Best Plants for Erosion Control on Slopes
- Hardscaping Solutions: Riprap and Stone Barriers
- Managing Water Runoff and Downspouts
- How to Fix Patio Washout
- Maintenance and Long-Term Protection
- DIY vs. Professional Solutions
- Frequently Asked Questions
Last Updated: September 2, 2026
Identifying the Causes of Patio Erosion
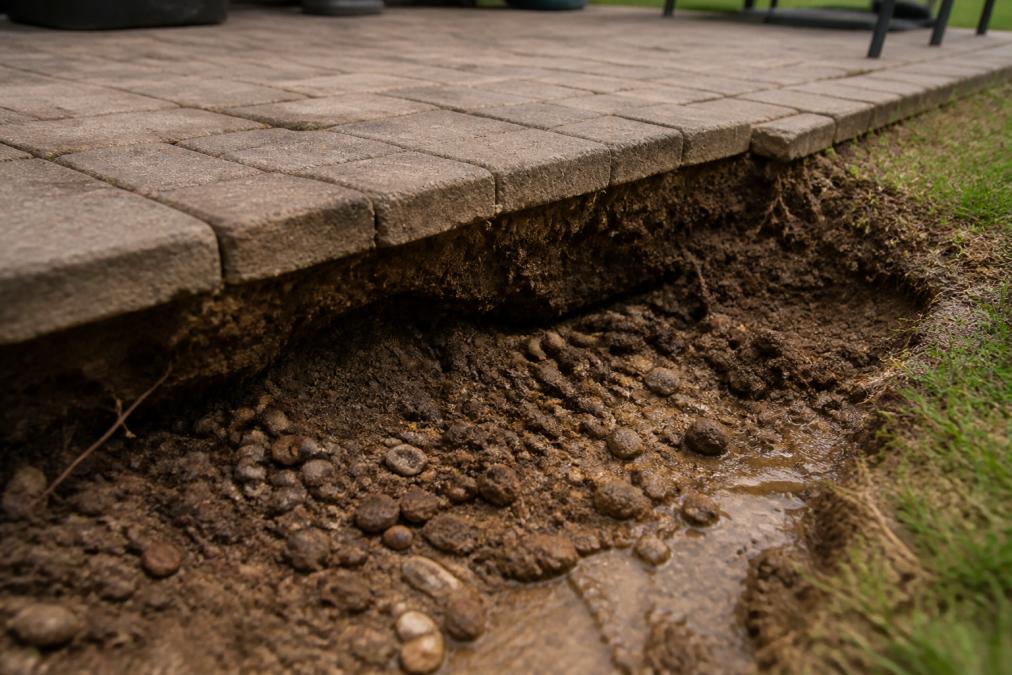
Soil erosion around patio edges occurs when water destabilizes the ground beneath and beside your outdoor space. Water flows, pools, and gradually carries soil particles away from where you need them most.
How Water Movement Destabilizes Soil
Rain hits your patio and flows downward, concentrating at the edges where soil meets hard surface. This surface runoff moves faster than soil can absorb it, carrying away topsoil particles and leaving gaps beneath your patio. When water gets under the patio, subsurface drainage creates channels that weaken compaction and cause pavers to shift, settle unevenly, or crack.
Slope grade matters enormously. Even a 1-2% slope (roughly 1 inch of drop per 4-6 feet) directs water toward one edge. Without a drainage channel to catch that water, it pools and destabilizes the soil foundation.
Slope Grade and Surface Runoff Issues
Most residential patios aren’t perfectly level. A slight downward grade concentrates water at one edge, where it sits, soaks in, and weakens soil structure. Surface runoff becomes dangerous when concentrated, a roof downspout emptying directly onto the patio edge will accelerate erosion dramatically.
Well-compacted soil resists water penetration and erosion. Loose, freshly-filled soil around a new patio is vulnerable for months until it settles naturally. This is why proper backfill and compaction are critical when fixing washout damage.
Check your patio’s slope by placing a level across different areas. Even a slight grade toward one edge means water is concentrating there, install drainage before erosion becomes visible.
Landscape Edging for Erosion Control
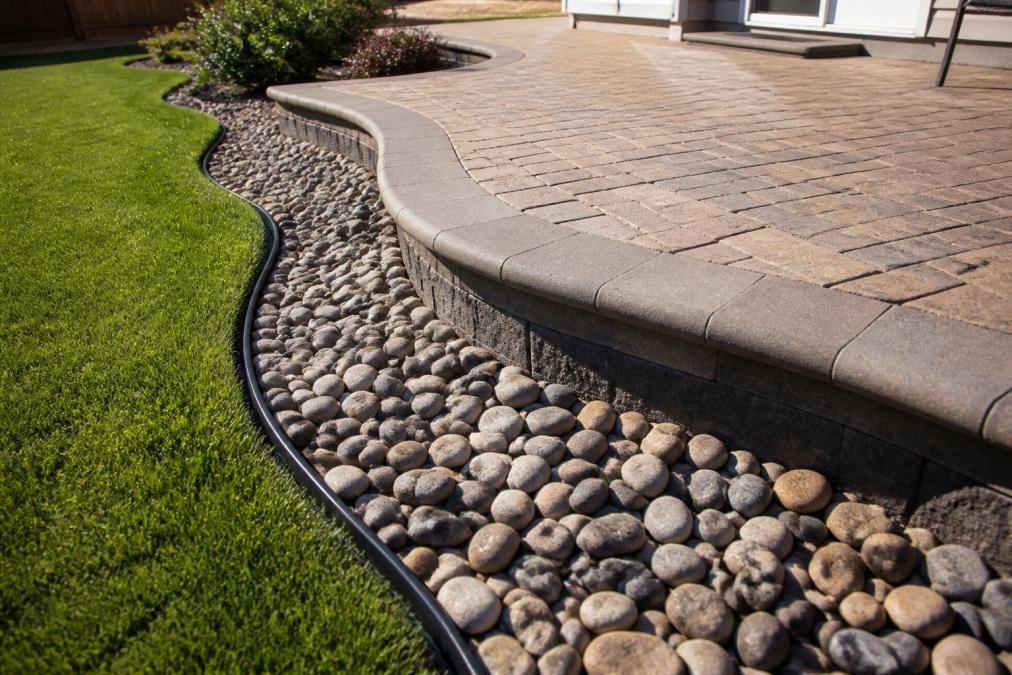
The right landscape edging acts as a barrier between your patio and surrounding soil. It slows water movement, contains soil, and prevents pavers from shifting into soft ground.
Permeable vs. Solid Edging Options
Permeable edging allows water to pass through while containing soil. Landscape fabric, metal edging with drainage holes, or natural stone borders work best when you have good subsurface drainage in place. Solid edging, concrete, plastic, or steel barriers, blocks water movement entirely but requires careful drainage planning to prevent water backup and soil saturation.
For most residential patios, a hybrid approach works best: use solid edging to define the patio boundary and prevent paver shifting, then install permeable edging or landscape fabric on the outer face to allow water drainage while containing soil.
Installation Depth and Compaction
Edging must go deep enough to anchor properly and protect against soil movement. Install edging 4-6 inches deep minimum, with the upper edge just above ground level. Shallow edging won’t stop water from flowing under it or prevent pavers from settling.
Compaction around the edging is critical. Backfill must be compacted in 2-inch layers using a hand tamper or mechanical compactor. Loose soil around edging allows water to flow through gaps, undermining the entire system. Use native soil or a soil-sand mix that compacts well; avoid pure sand or clay.
Edging depth and compaction matter more than the edging material itself. Shallow, loosely-installed edging fails regardless of whether it’s permeable or solid.
Best Plants for Erosion Control on Slopes
Living root systems are one of nature’s most effective erosion control tools. Plant roots bind soil particles together and create a network that resists water movement while absorbing moisture that would otherwise cause runoff.
Native Vegetation and Root Systems
Native plants are your best choice because they’re adapted to your local rainfall, temperature, and soil conditions. Deep-rooted native species like bayberry, serviceberry, or native viburnums develop root systems that penetrate 2-3 feet or more, anchoring soil at depth. Grasses with fibrous root systems, like native bluestem or switchgrass, create a dense mat that resists water movement.
Plant in clusters or drifts, spacing them close enough that mature canopies overlap to create a continuous protective layer. Spacing is typically 18-36 inches apart depending on species. Root development takes time, during the first year, newly planted vegetation is vulnerable. Temporary erosion control blankets or mulch layers protect the slope during establishment.
Groundcover Selection for Your Climate
Groundcover plants create a low, dense layer that breaks the force of falling rain and slows surface runoff. For most climates, creeping junipers, sedums, and native groundcovers like creeping phlox work well. Choose species rated for your USDA hardiness zone and local moisture conditions.
Plant groundcover densely from the start, 12-18 inches apart for faster coverage. Gaps between plants are where erosion happens. Combine groundcover with taller plants to create multiple layers of root systems at different depths for the strongest erosion control.
Hardscaping Solutions: Riprap and Stone Barriers
When plants alone can’t handle water volume or slope severity, hardscaping solutions physically slow water movement and dissipate its energy before it erodes soil.
Riprap Placement and Sizing
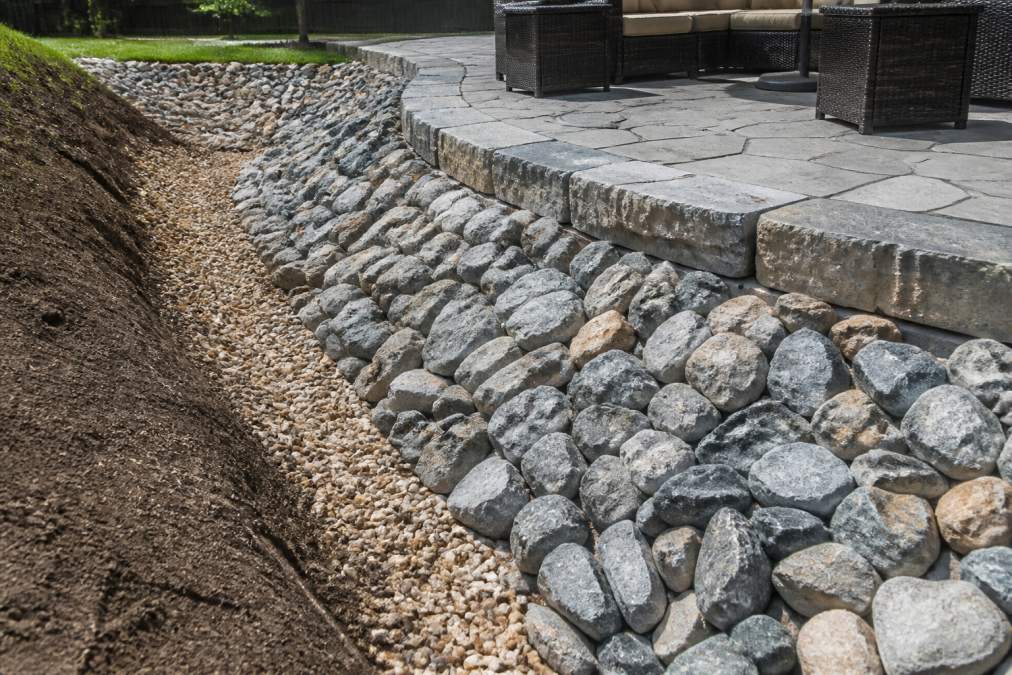
Riprap consists of large, angular rocks placed along slopes or at patio bases to absorb water energy and prevent erosion. Rocks must be sized appropriately for water volume. For typical residential patios, riprap stones should be 3-6 inches in diameter for gentle slopes, and 6-12 inches for steeper slopes or concentrated runoff areas (usda.gov). Angular stones interlock better than rounded ones.
Riprap should extend at least 2-3 feet out from the patio edge and be anchored into the slope with landscape fabric underneath. The fabric prevents soil from washing through riprap while allowing water drainage. Without fabric, fine soil particles migrate through gaps and the riprap settles into eroded space.
Compact the base layer before placing riprap. If repairing washout damage, remove loose, eroded material first, then compact solid soil beneath. Place landscape fabric over this compacted base, then lay riprap on top. This three-layer system, compacted soil, permeable barrier, and energy-dissipating stones, provides effective protection.
Retaining Walls and Terracing
Retaining walls stop erosion by containing soil and preventing slope failure. A properly built wall must lean slightly backward (called batter) so gravity helps hold soil in place. Walls taller than 4 feet usually require professional engineering and building permits (iccsafe.org).
Drainage behind the wall is essential. Without it, water pressure builds and eventually pushes the wall over. Install a drainage channel or French drain at the base and backfill with permeable material like gravel, not clay or compacted soil.
Terracing is an alternative to a single tall wall. Build two or three shorter walls with level terraces between them to distribute soil load, reduce water pressure, and create usable space. Both retaining walls and terracing require solid footings below the frost line to prevent heaving in winter.
A retaining wall that leans outward, cracks, or shows movement is failing. Water pressure is building behind it. Professional repair is needed immediately to prevent collapse.
Managing Water Runoff and Downspouts
The water causing erosion often originates from your roof, gutters, or grading. Controlling where that water goes is sometimes more effective than stopping erosion after the fact. Every downspout and gutter should direct water away from your patio.
Drainage Channels and French Drains
A drainage channel is a shallow, sloped trench that captures surface runoff and directs it away from vulnerable areas. For patios, a channel running along the upslope edge catches water before it flows across your patio surface. The channel should slope gradually toward a low point where water can be diverted to a catch basin or storm drain.
Channels can be as simple as a 4-6 inch wide, 2-3 inch deep trench filled with permeable edging or landscape fabric. The key is consistent slope, water won’t flow through a level or reverse-sloped channel.
A French drain is a subsurface solution for water already in the soil. It consists of a perforated pipe buried in a gravel-filled trench. Water from surrounding soil enters the pipe and is directed away from the problem area. The pipe must slope toward an outfall, low point, storm drain, or daylight exit.
Downspout Extensions and Catch Basins
Downspout extensions are the simplest, most effective water management tool for preventing soil erosion around patios. A 10-foot extension directs roof water far from your patio, eliminating a major erosion source (the EPA). Extensions can be rigid PVC pipe, flexible downspout extensions, or splash blocks that angle water away.
Catch basins collect water from downspouts and drainage channels, then direct it to a storm drain or outfall. A catch basin is a box-shaped structure with a grate on top. For residential patios, a catch basin is most useful in low spots where water naturally collects, ensuring water flowing through a drainage channel has somewhere to go.
How to Fix Patio Washout
Patio washout is visible evidence of erosion, pavers have settled, cracked, or become unstable because soil beneath them has eroded or compacted unevenly. Fixing washout requires removing damaged pavers, assessing soil stability, and rebuilding the foundation properly.
Assessing Damage and Soil Stability
Remove affected pavers, usually 2-4 feet of the patio edge. Look at the soil beneath. If it’s firm and compacted, the problem is localized. If the soil is soft, muddy, or shows water damage throughout, the entire patio foundation may be compromised.
Check for water sources. Is water still flowing into this area? Are downspouts draining here? You can’t fix washout permanently without stopping the water that caused it. Examine the patio’s structural integrity, pavers settled more than 1/4 inch or showing cracks indicate ongoing movement.
Backfill and Compaction Repair Steps
Step 1: Remove loose material. Dig out all soft, muddy, or eroded soil, going deeper than the original patio base if necessary.
Step 2: Compact the base. Tamp the exposed soil firmly using a hand tamper or mechanical compactor. Compact in 2-inch layers if the hole is deep, each one tamped until firm before adding the next.
Step 3: Add drainage layer. Add a 2-3 inch layer of gravel or permeable base material to allow water drainage rather than pooling under your patio.
Step 4: Install sand base. Add 1-2 inches of sand over the gravel as the final base layer. Spread it evenly and level it carefully.
Step 5: Replace pavers. Set pavers back in place, checking that they’re level and aligned. Use a rubber mallet to tap them into the sand base.
Step 6: Fill joints. Fill gaps between pavers with polymeric sand or regular sand. Sweep the sand into joints, spray lightly with water to help it settle, then sweep again.
Maintenance and Long-Term Protection
Fixing erosion is one thing. Preventing it from happening again requires ongoing maintenance.
Mulch and Erosion Control Blankets
Mulch provides temporary protection while plants establish. A 2-3 inch layer of wood mulch or bark reduces the force of falling rain, slows surface runoff, and keeps soil moist. Erosion control blankets are temporary coverings made of biodegradable material that hold soil in place while vegetation establishes. For slopes steeper than 3:1, erosion control blankets are worth the investment.
Seasonal Inspection and Upkeep
Inspect your patio and surrounding landscape twice a year, spring and fall. Look for new ruts, exposed roots, settled pavers, or areas where soil has washed away.
Clear gutters and downspouts before heavy rain season. Check that drainage channels and French drains are flowing properly. Refresh mulch annually, a fresh 2-inch layer in spring provides protection for the year ahead. Inspect plants for signs of stress; established plants should need little water beyond natural rainfall.
The most effective erosion prevention is regular maintenance. Spending 30 minutes twice a year inspecting and clearing drainage prevents the washout that costs thousands to repair.
DIY vs. Professional Solutions
DIY work is appropriate for simple edging installation, mulch application, basic plant selection, landscape fabric placement, riprap installation, and simple drainage channels. Professional help is necessary for retaining walls taller than 2-3 feet, French drain installation, significant grading changes, or situations where multiple problems interact.
Professional solutions can be a valuable investment. A properly designed retaining wall can last for many years.
At Alpha Guard, we help residential property owners in the area assess erosion problems and design lasting solutions. Our certified and insured professionals evaluate your patio’s drainage situation, recommend appropriate fixes, and handle installation with guaranteed structural workmanship. Whether your erosion is minor or severe, we can help you determine whether a DIY approach or professional installation makes sense for your situation.
Preventing soil erosion around patio edges requires understanding how water moves through your landscape and stopping it before it causes damage. The solutions range from simple plant selection and mulch application to complex drainage systems and retaining walls. Alpha Guard’s team can help you assess your specific situation, recommend the right combination of solutions, and handle professional installation if needed. Get a free estimate today to learn which erosion control strategies will protect your patio long-term.
Frequently Asked Questions
What type of landscape edging is best for preventing soil erosion around patios?
Permeable edging like landscape fabric combined with stone or metal borders works well because it allows water drainage while containing soil. For areas with heavy water flow, consider rigid metal or composite edging installed 4-6 inches deep with compacted backfill. The key is ensuring the edging extends below the soil surface to anchor properly and prevent soil from washing underneath during heavy runoff.
How do I fix soil erosion that’s already happening around my patio?
Start by identifying the water source causing the washout. Clear away loose soil and debris, then backfill the eroded area with compacted topsoil. Install landscape edging or hardscaping (riprap, stone barriers) to redirect water flow. For severe patio washout, you may need to add a drainage channel or extend downspouts away from the patio edge to prevent future erosion.
Can plants really help prevent soil erosion on slopes near my patio?
Yes. Native groundcover plants with dense root systems stabilize soil and reduce surface runoff. Plants like creeping juniper, sedge, and native grasses are effective for slopes. Their root networks bind soil particles together and slow water movement down the slope. Combine plants with mulch and edging for maximum protection. Choose species suited to your climate for best results.
Will gravel or mulch stop soil erosion around my patio edges?
Mulch helps by reducing the impact of rainfall on bare soil and slowing surface runoff, but it’s not a complete solution on its own, mulch can displace during heavy water flow. Pair mulch with landscape edging, hardscaping, or drainage improvements for effective erosion control. Gravel alone won’t stop erosion unless it’s large riprap installed in a stable layer with proper compaction and edging underneath.
This article was written using GrandRanker